Showing posts with label Tuesday Morning Sketches. Show all posts

Tuesday, September 28, 2010

Tuesday Morning Sketches - Sketch #61

Hello!

This is my last week of guest designing for Tuesday Morning Sketches.  It has been oodles of fun being a guest designer for this fantabulous blog!!!   Our sketch this week was super fun, and using it combined with a fun image from Sweet n Sassy Stamps, I came up with a super cute card!!
The Sketch


The Card


Hope you all have a fantastic Tuesday!!!!  Thanks again to Tuesday Morning Sketches for allowing me to join their design team for the month!!!

Please leave a comment.  I love to hear from you!!

Lisa

Tuesday, September 21, 2010

Homeade Flower Challenge - Tuesday Morning Sketches

Hello!

I am guest designing again this week for Tuesday Morning Sketches, and our challenge this week is to make homemade flowers and use them in a project!   HOW FUN!!!!!  I love this kind of challenge, and have created a quick tutorial for you for the flowers I used on my project.  Be sure to hope over to Tuesday Morning Sketches to see our fabulous giveaway, and participate in the challenge this week!!

People are LOVING the Tim Holtz 3D flower dies, and as such, they seem to be out of stock almost everywhere.  Today I have a super easy way for you to create the same effect with a tool that you probably already have!

The Process

1. Using a scalloped circle punch (mine was 2 1/2 inches),
punch out scalloped circle from whatever paper you want to work with.


2. Using your paper scissors, make a cut into the scalloped circle,
starting between two of the scallops...


 3.  Continue cutting around the circle until you end up with something
that looks like this!


4. Using a mini-mister or spray bottle, spritz your scalloped circle with
some water to make the paper a bit more pliable.
 5. Begin twirling your paper to form your flower.  I start out with my
paper piercer because the very inside is a bit hard to work with at first.


 6. Once I have the beginning of the flower formed, I continue forming
the flower with my fingers.
 7.  When you are finished, you will end up with something like this!


 8. Again I used my paper piercer, but this time to gently open my flower up a bit.  This is not necessary, however I wanted my flower to be a bit more open.


 9. Using some Scotch Quick Dry glue I adhered the bottom flat piece of my scalloped circle to the base of my flower.


10. And you are done!  Add whatever bling you want to the middle and let your flower dry for a few minutes!


I ended up making three of these little guys for my card.

 After they dried a bit, I spritzed them with some Silver Smooch Spritz to give them a bit more 'something-something' (haha).


My Card


Cardstock: Kraft, Hawaiian Shores, Aqua Mist (Papertrey Ink)
Sentiment: Fillable Frames #5 (Papertrey Ink)
Ink: True Black (Papertrey Ink)
Glitter: Dazzling Diamonds (Stampin' Up!)
Silver Smooch Spritz (Stampin' Up!), 1/8 inch Score Tape, Pearls

Hope you enjoy! 
Please leave a comment.  I love to hear from you!

Lisa

Tuesday, September 14, 2010

Boo! - Tuesday Morning Sketches!

Hello!

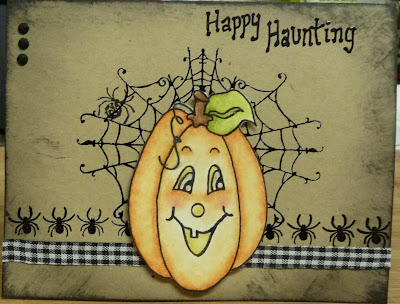
This is the second week of my guest design spot at Tuesday Morning Sketches, and I have a super cute project to share!  We are being sponsored by Prairie Fairy Designs, and they have provided the CUTEST image for us to use in our projects.  I made a 12x12 layout with the image, and some fab Hallowe'en papers I have been itching to use!  Hope you enjoy!

The Sketch 


The Layout


Thanks for visiting today!
Please leave a comment.  I love to hear from you!

Lisa
Tuesday, September 7, 2010

Guest Designer for Tuesday Morning Sketches!!!

FUN FUN FUN!!!!  Today I am beginning my Guest Designer spot at Tuesday Morning Sketches!  I will be a guest designer all month, and am SO looking forward to it!  I have a card for you today based on Melissa's sketch, which features an image from Glitterbabe, our sponsor!!!
I did some hand stitching onto this card...a first for me...I enjoy it, but felt it left too much blank space so I added some stickles.  I think next time I will stitch onto a patterned paper and then tear the edges for a greater effect.  Hope you enjoy!!

The Sketch


The Card


Cardstock: Dark Chocolate, Ripe Avocado (PTI)
Image: Script Flower (Glitterbabe)
Stamp: Vintage Picnic Sentiments (PTI)
Ink: True Black (PTI), Copics
Ribbon: Wrinkle Ribbon (Michelle Wooderson Etsy Shop)
Stitching Template: Flourishes (Bazzill Basics)
Stitching (White Embroidery Floss), White Stickles, Pink Stickles

Friday, September 3, 2010

Black, Yellow and Cream!!! What a fantastic combo!

Hello!

I made a quick card yesterday with a few doses of inspiration from Tuesday Morning Sketches (sketch) and Davinie Fiero for Studio Calico (colour combo).


Cardstock: Vintage Cream, True Black (PTI), Crushed Curry (SU!)
Patterned Paper: The Mod Retro Stack (DCWV)
Stamps: Background Basics: Text Style (PTI), Vintage Vogue (SU!)
Ink: True Black (PTI)
Ribbon: Vintage Cream Luxe Satin (PTI)
Die Cuts: Beautiful Wings Embosslits (SU!)


Have a great day!
Please leave a comment.  I love to hear from you!

Lisa

Friday, August 20, 2010

'For You' Card

Hello!

I have a card to post today!  I made this for this weeks Tuesday Morning Sketches challenge...it is called a diagonal double pocket card, and this is the first time I have ever made one.  It is not my fave ever, I think because I don't like the patterned paper that I used.  Next time I will chose a more simple pattern for both sides...this one is just a bit too busy for me...however LOVE the folding technique!!!


Cardstock: Simply Chartreuse (PTI)
Patterned Paper: Spread Your Wings (Little Red set by Three Bugs in a Rug)
Stamps: Top Ten, Top Ten Additions (PTI), Great Friend (SU!)
Ink: True Black (PTI), Kiwi Kiss, Baja Breeze, Pink Pirouette (SU!)
Twine, Flower (Prima), Ticket Punch (EK Success)

Hope you enjoy!
Please leave a comment.  I love to hear from you!!

Lisa

Friday, August 6, 2010

Thanks, Teacher

Hello!

I have been out of town for about a week and a half for a friends wedding, and then a little bit of camping fun, so it has been fun, fun, fun to get back into some crafty goodness!!!  I have a card today that I made using this weeks sketch from Tuesday Morning Sketches.  This card was super simple to put together, and I really like how it turned out!


Cardstock: Rustic Cream, Kraft, Ocean Tides (PTI)
Patterned Paper: 2009 Bitty Box Basics (Pure Poppy), Library Ledger (PTI)
Stamps: It's Official, School Time (PTI)
Buttons and Twine (PTI)
Punch: Scalloped Scallop (EK Success)
Glitter: Stampin' Glitter (Dazzling Diamonds) (SU!)


I hope you enjoy!
Please leave a comment.  I love to hear from you!

Lisa

Wednesday, July 28, 2010

Christmas in July with Tuesday Morning Sketches

Hello!

Tuesday Morning Sketches has issued a 'Christmas in July' challenge for the fourth and final week of their birthday celebrations!  How fun!  I made a card using sketch #35.  I was playing with my distress inks with this one, which are a new tool for me (I know...I am a tad behind the trends here!), and have definitely NOT mastered them...haha.  I think I have the wrong sponge piece for my applicator tool...so that means a trip to Michael's to find the correct ones (DARN!).  Here is what I came up with:


Cardstock: Dark Chocolate (Papertrey Ink)
Pattern Paper: Snowy Jo Collection (Imaginisce)
Stamp: Signature Christmas (Papertrey Ink)
Ink: Frayed Burlap, Fired Brick (Tim Holtz Distress Ink), Snowflake (Martha Stewart)
Ribbon: Cream (Offray)

Hope you enjoy!
Please leave a comment.  I love to hear from you!!

Lisa

Wednesday, July 21, 2010

Happy Anniversary Card

Hello!

Another quick anniversary card today!  My inspiration for this card came from Tuesday Morning Sketches.  This is the third week of their bloggy birthday celebrations!  I used sketch #1 for this card, and covered it with oodles of flowers, one of my fave things about summer.


Cardstock: Hawaiian Shores, Pure Poppy (Papertrey Ink)
Patterned Paper: Beautiful Blooms (Papertrey Ink)
Stamps: Fillable Frames #1, Round & Round (Papertrey Ink)
Ink: Hawaiian Shores, Pure Poppy, True Black (Papertrey Ink)
Die Cut: Fillable Frames #1 (Papertrey Ink)
Flower, Brad (unknown)

Hope you enjoy!
Please leave a comment.  I love to hear from you!

Lisa

Wednesday, July 14, 2010

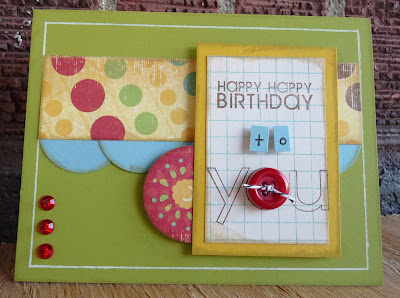
Happy Birthday to You!

Hello!

A quick happy birthday card today!  I love, love, LOVE how this card turned out.  My inspiration came from Tuesday Morning Sketches.  This is week 2 of their one year bloggy birthday celebrations!  I used sketch #43.  We were also asked, if we could, to use an image from Inktegrity, however my printer is on the fritz, so no image for me!  There are some super cute images available at Inktegrity...I am especially in love with some of the fairies, and a tree image.  You should definitely check them out!  Anywhoo, back to my card:


Cardstock: Simply Chartreuse (Papertrey Ink), Baja Breeze (Stampin' Up!)
Patterned Paper: Wild Saffron Paper Pack (K&Company)
Stamps: Baby Button Bits, Fillable Frames #3 (Papertrey Ink)
Ink: Dark Chocolate, Tea Dye Duo (Papertrey Ink)
Button, Twine (Papertrey Ink)
Pen: Espresso Stampin' Write Marker (Stampin' Up!)
Crystals (unknown)
White Gel Pen (Inkssentials)
Hope you enjoy!
Please leave a comment.
I love to hear from you!

Lisa

Wednesday, June 30, 2010

Flutter, Flutter, Butterflies

Hello!

Today I participated in two challenges:
 1) Sketch challenge at Tuesday Morning Sketches
 2) Colour challenge at My Pink Stamper

I made a simple card using scraps that I had lying around (ok, cluttering the surface of) my desk!  It turned out oh so cute!


1) Create card base by scoring and folding a 8 1/2 x 5 1/2 piece of Chocolate Chip cardstock (Stampin' Up!)

2) Emboss a strip of Simply Chartreuse cardstock (Papertrey Ink) using Cuttlebug and Cuttlebug Embossing folder 'Tiny Bubbles'

3) Cut two strips of eyelet lace border from Raspberry Fizz cardstock (Papertrey Ink) using the Cuttlebug and the Eyelet Lace Border Die from Papertrey Ink.  Adhere to both sides of Simply Chartreuse strip of paper.

4) Attach ribbon to Simply Chartreuse strip of paper 3/4 of the way across the front (adhere with tape or a bit of glue runner) and tape on the back of this strip.  Adhere strip to card base.

5) Layer two pink flowers together, secure with large green brad, and adhere to card front (make sure you cover the end of the ribbon) using  a large glue dot.

6) Cut butterflies from orange and cream patterned paper using the Cuttlebug and the Beautiful Wings Embosslits die from Sizzix/Stampin' Up!.  Spritz butterflies with White Shimmer Smooch Spritz (Stampin' Up!) and adhere to card front with glue dots.  Attach clear crystal to center of largest butterfly.

I have not included a sentiment for this card because I am not sure what occasion this will be used for yet. 
Hope you enjoy my card!

Please leave a comment.  I love to hear from you!
Lisa
>

LinkWithin

Blog Widget by LinkWithin